You need to follow the below steps to enable single sign-on.
In Atatus
Go to Settings » Account Settings » Single sign-on tab in Atatus.
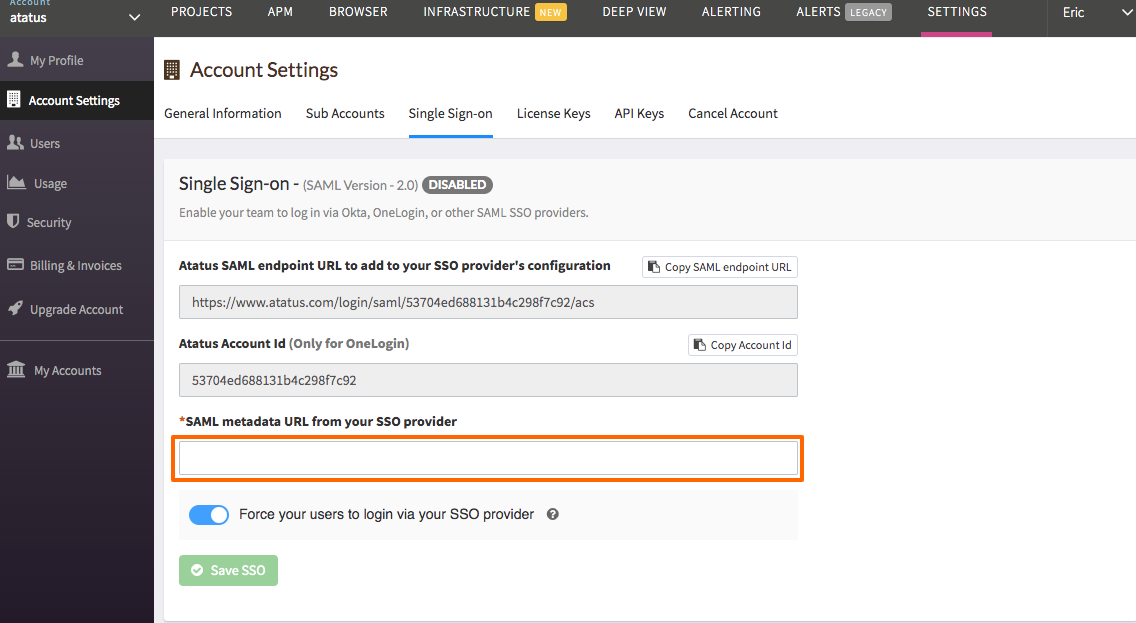
Copy the Atatus SAML endpoint URL
In Google:
In the Google Admin console, click on Apps followed by SAML Apps and then click on + button to Enable SSO for a SAML application.
Click on Setup My Own Custom App present at the bottom of the page.
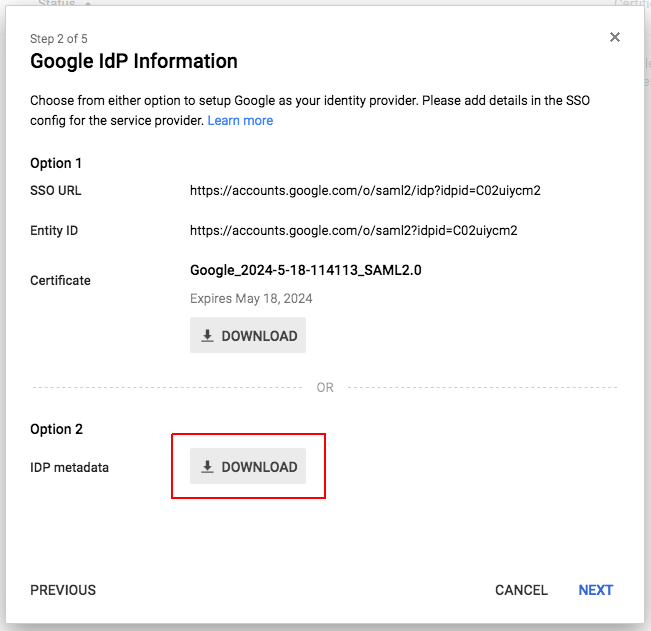
Next, choose Option2 and download the IDP metadata. Atatus can only access the XML file if it is publicly hosted. The file must be served directly and needs to be available permanently.
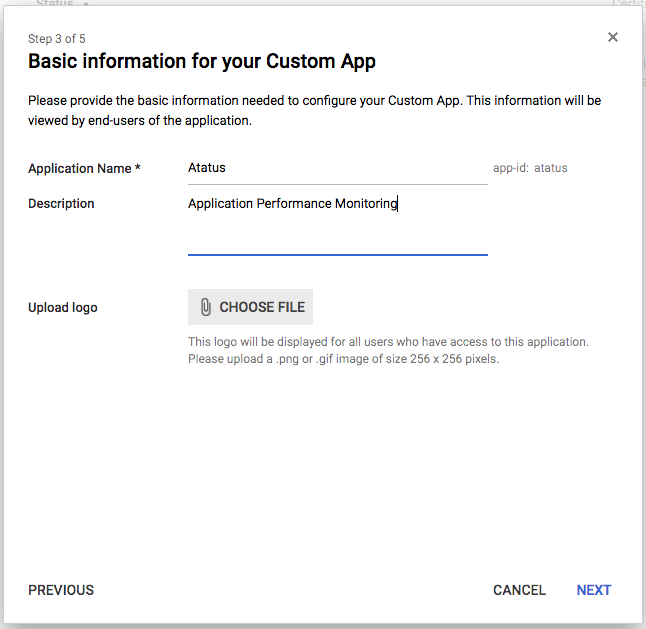
Fill out the Basic information for your Custom App page. Click on next when you're done.
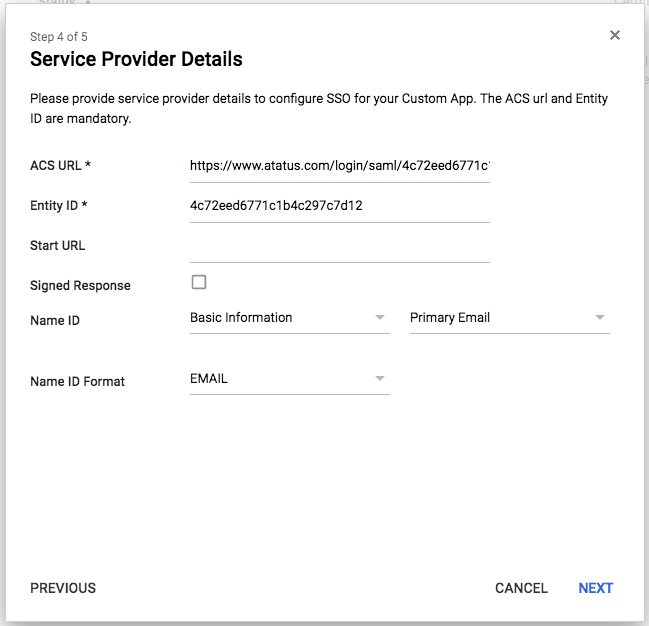
Fill out the Service Providers Details.
- In the ACS URL text box, paste the Atatus SAML endpoint URL which you can copy from Atatus Settings » Account Settings » Single sign-on.
- In the Entity ID text box, enter Atatus Account Id. Click on the next button.
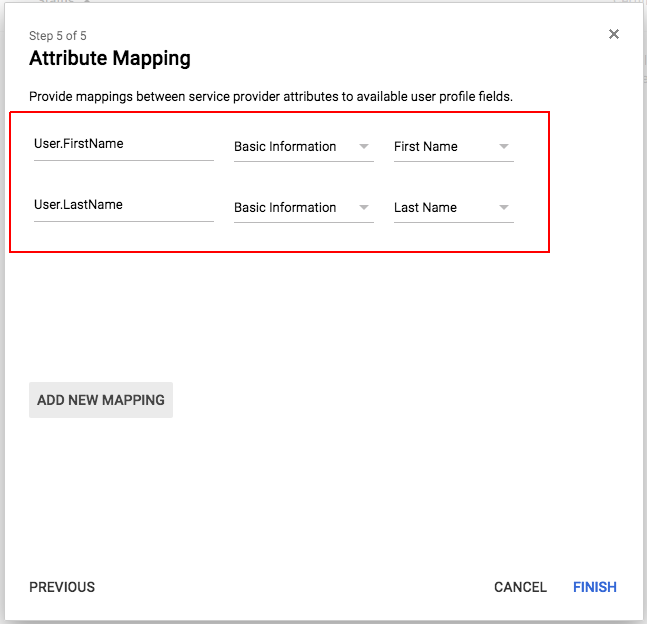
Next, add the details for Attribute Mapping. You need to add mapping for User.FirstName and User.LastName.
Click on the Finish button. You can enable SSO for the users who need access to Atatus.
In Atatus
Go to Settings » Account Settings » Single sign-on tab in Atatus.
- Paste the publicly hosted SAML metadata URL into the SAML metadata URL from your SSO provider text box.
- Click on the Save SSO button.
Now your Single Sign-on feature is enabled and ready for use.
 +1-415-800-4104