Set Up Atatus for SSO
- Log in to your Atatus account.
- Navigate to Settings → Account Settings → Single Sign-On.
- Copy the Account ID, which will be used as the Client ID in Keycloak.
- Choose one of the following methods to upload metadata:
- Option A: Paste the SAML metadata URL from Keycloak. The format should be: https://<your-host>/realms/<realm-name>/protocol/saml/descriptor
- Option B: Upload the SAML metadata XML file manually.
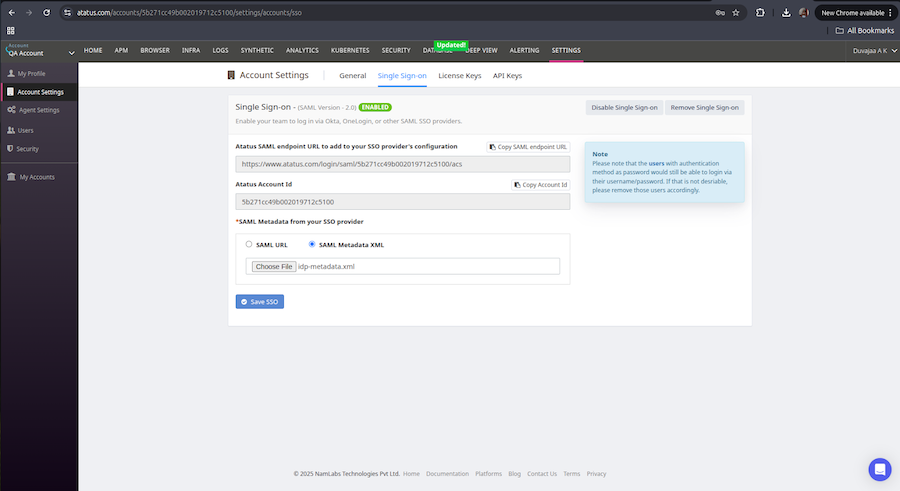
5. Click on the Save SSO button
Note: In order to retrieve the SAML metadata URL, you must first complete the Keycloak configuration steps below.
Configure Keycloak
1. Create a Realm
- Log in to the Keycloak Admin Console.
- In the top-left menu, click on Keycloak next to the Master realm.
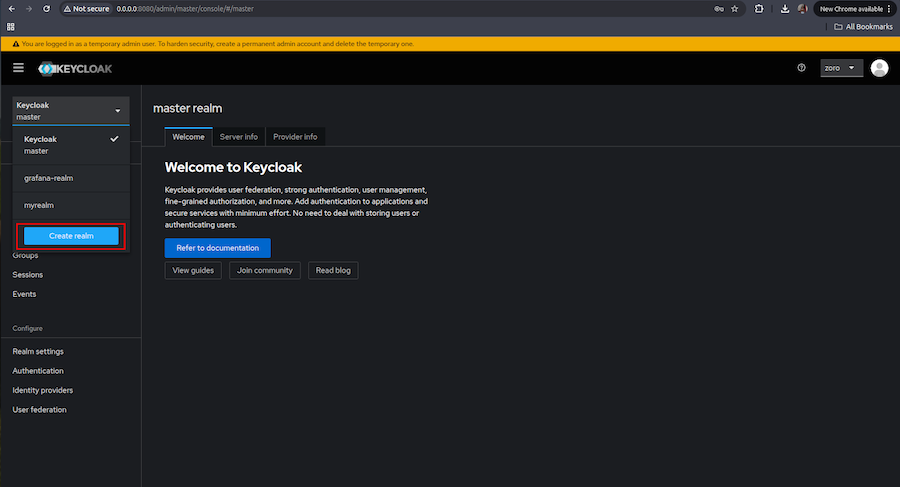
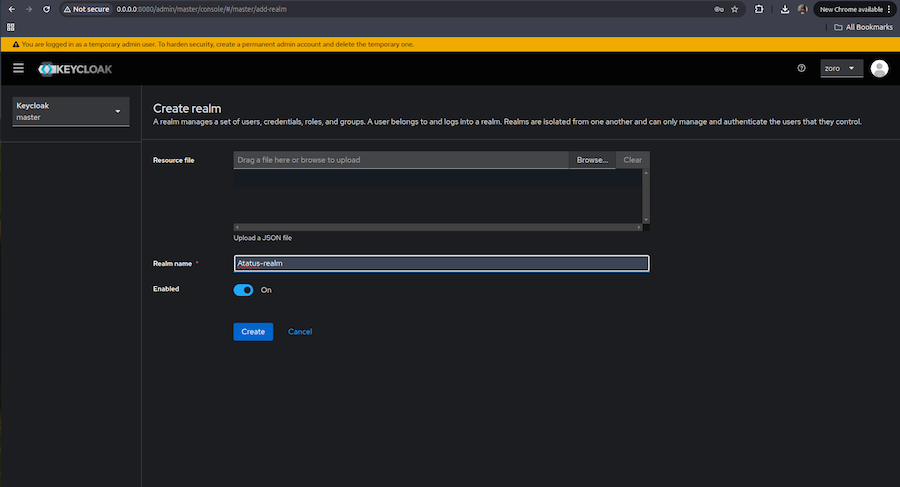
- Select Create Realm, and provide a name (e.g., Atatus-realm).
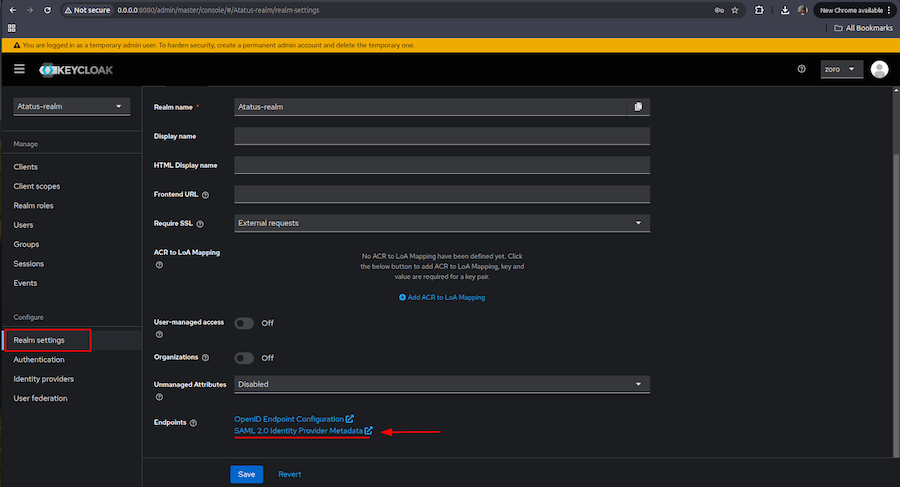
- Once the realm is created, go to Realm Settings.
- Download the SAML Identity Provider Metadata for later use in Atatus.
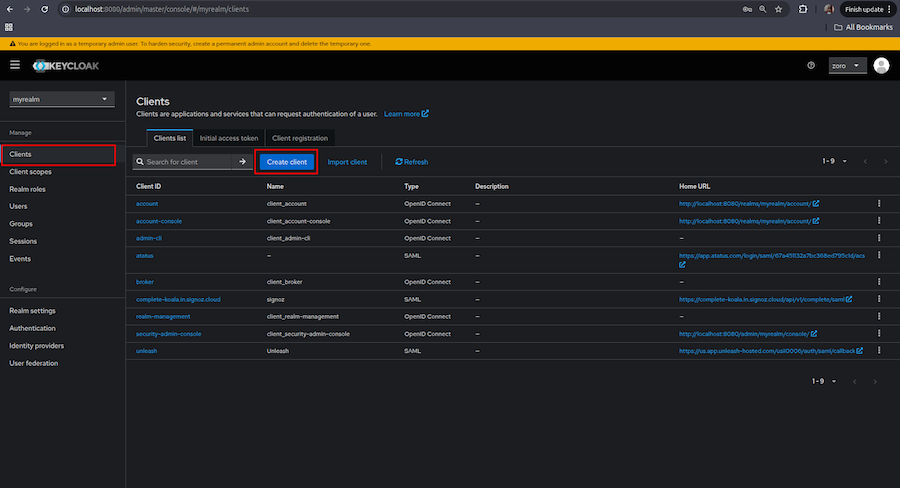
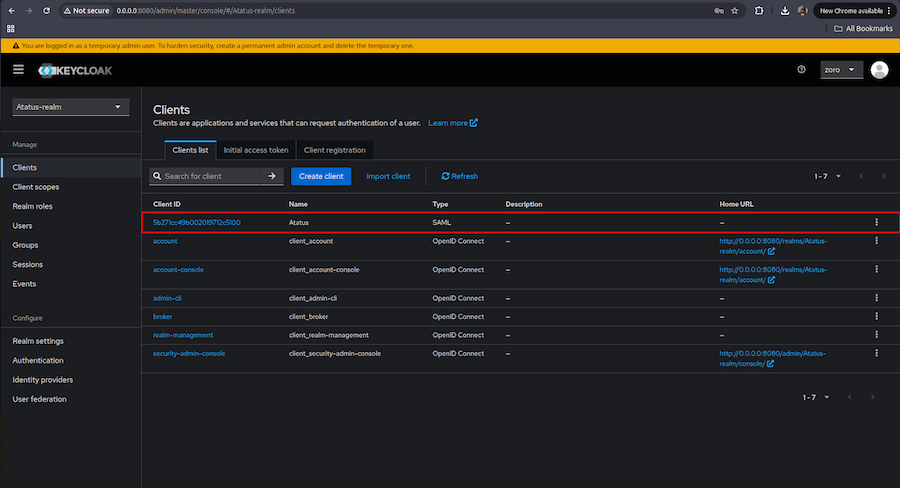
2. Create a Client
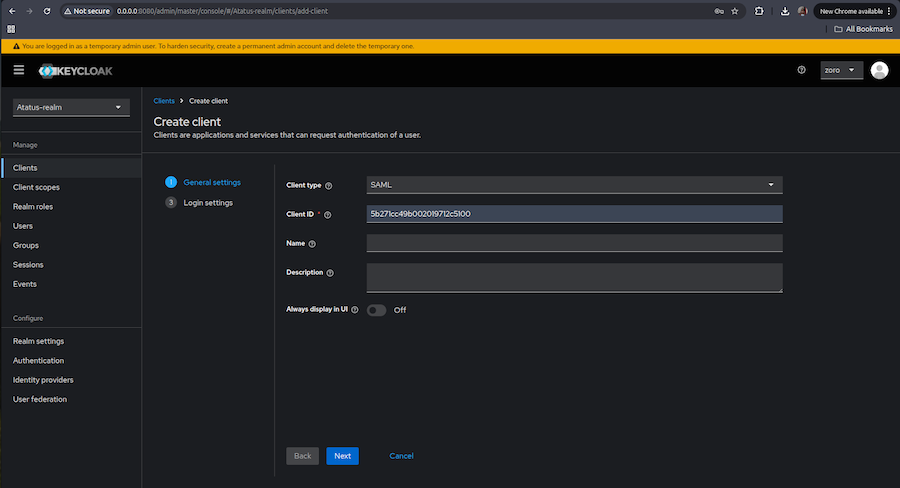
- Navigate to Clients > Create Client.
Fill in the following details:
- Client Type: Select SAML.
- Client ID: Enter the Account ID value obtained from the Atatus Single Sign-On settings page. This acts as the SAML issuer.
- Home URL (required if accessing Atatus through Keycloak): Enter the Atatus SAML endpoint URL.
- Valid Redirect URIs (required): Provide either https://www.atatus.com/* or use a wildcard * if flexibility is needed during testing.
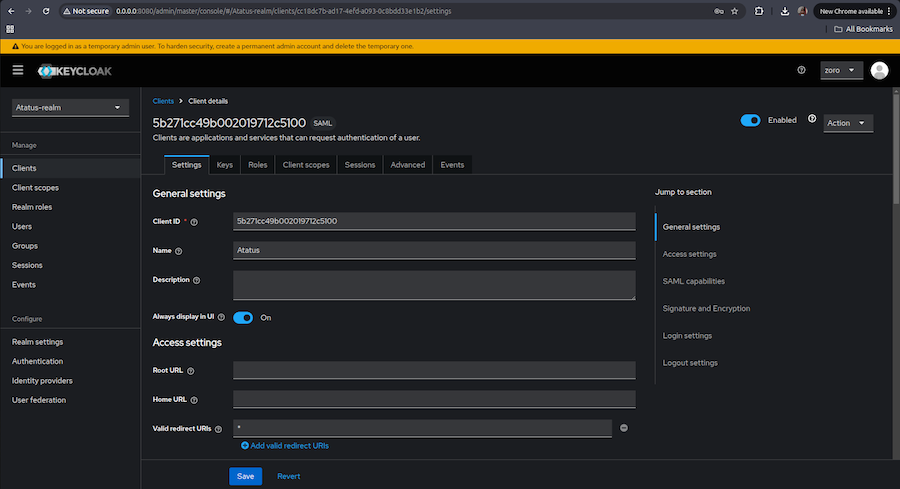
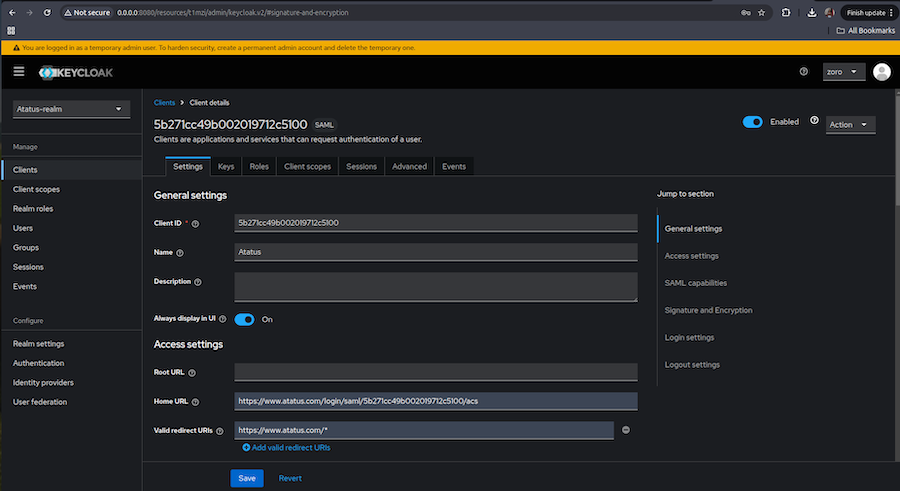
Use the default settings unless specific changes are needed.Click save.
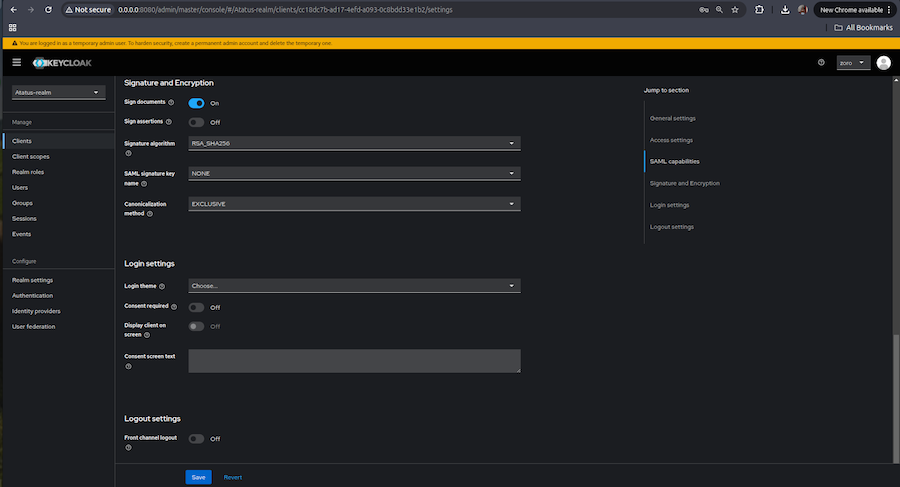
Click Save to create the client.
After creation, ensure the client appears in the list.
Now your Single Sign-on feature is enabled and ready for use.
 +1-415-800-4104