 Integrate JIRA with Atatus
JIRA is an issue tracking system built by the Atlassian team.
Setup
Go to project Settings » Ticketing Integrations » JIRA in Atatus.
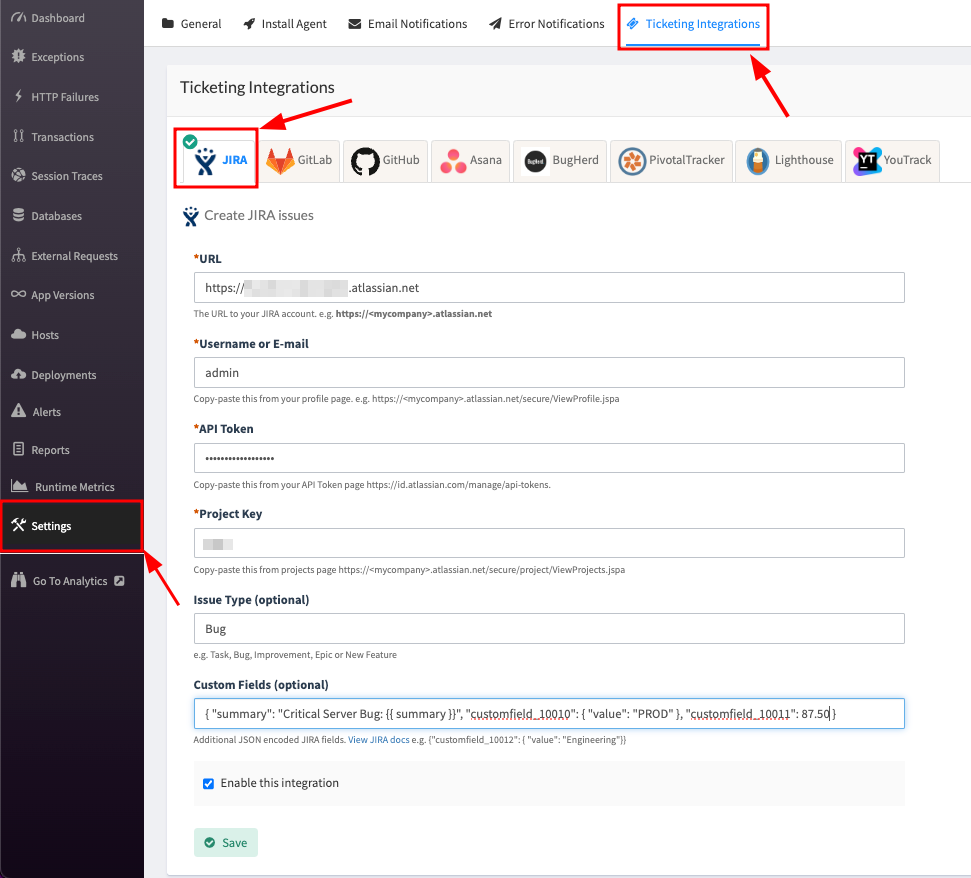
Enter the
URLof your JIRA account. Example,.https://myaccount.atlassian.netEnter your
email address (or) usernameandAPI token(password - in case if it is older version) in the respective text box.Copy and paste the
Project Keyfrom your JIRA project edit page into the text box. Example,https://myaccount.atlassian.net/secure/project/ViewProjects.jspaEnter the issue type. It can either be Task, Bug, Improvement, Epic or New Feature. By default, the issue type is Task.
Add Custom Field and Summary
Custom Field: You can send any custom fields along with your error details to JIRA. Custom fields are uniquely identified by the field ID, as display names are not unique within a Jira instance.Summary: Change the JIRA task summary with your custom text. You can use the Atatus summary with a variable "{{summary}}"
Click on the Save button when you're done.
JIRA is now successfully integrated with Atatus. You can start tracking the bugs.
How to Use
After you set up the integration, you'll notice a JIRA button below the error message in the Error page. This will allow you to create a new issue for the error or link with an existing one.
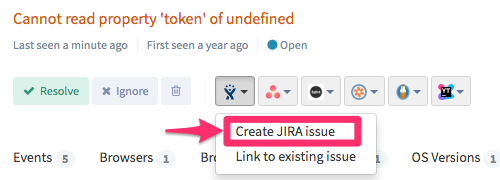
Once the issue is created or linked, you will see the link in the drop down menu. To jump to the issue in JIRA simply click on the link created.

 +1-415-800-4104