

What You Will Need
Before you begin, verify that you have:- An Atatus account with the Owner or Admin role.
- Administrative access to the Google Admin console (Super Admin or administrator privileges to manage SAML apps).
Step 1: Get Service Provider Values from Atatus
- Log in to your Atatus dashboard.
- Navigate to Settings » Account Settings » Single Sign-on.
- Keep this tab open. Copy and record the following parameters:
- Atatus SAML ACS URL:
https://app.atatus.com/login/saml/<ACCOUNT_ID>/acs - Atatus Account Id: Your unique 24-character alphanumeric identifier.
- Atatus SAML ACS URL:
Step 2: Add a Custom SAML App in Google Workspace
- Sign in to the Google Admin console.
- From the Home page, navigate to Apps » Web and mobile apps.
- Click Add app, then select Add custom SAML app.
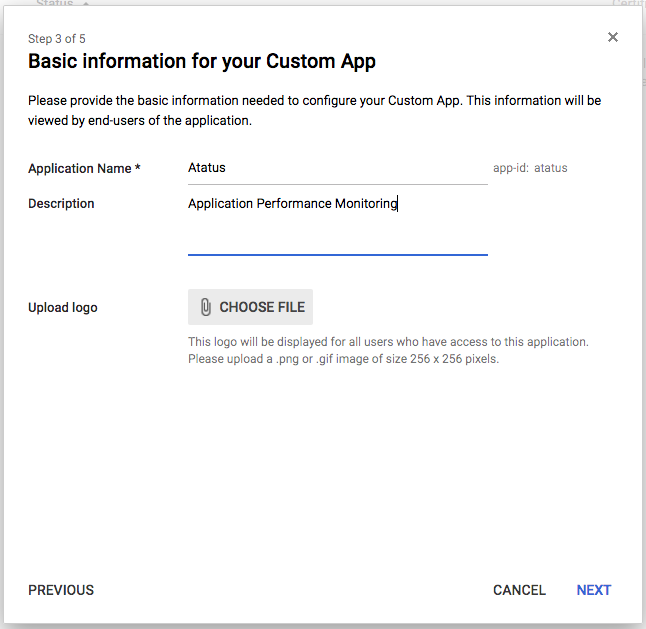
- In the App name field, enter
Atatus. - Click Continue.
Step 3: Download Google IdP Metadata
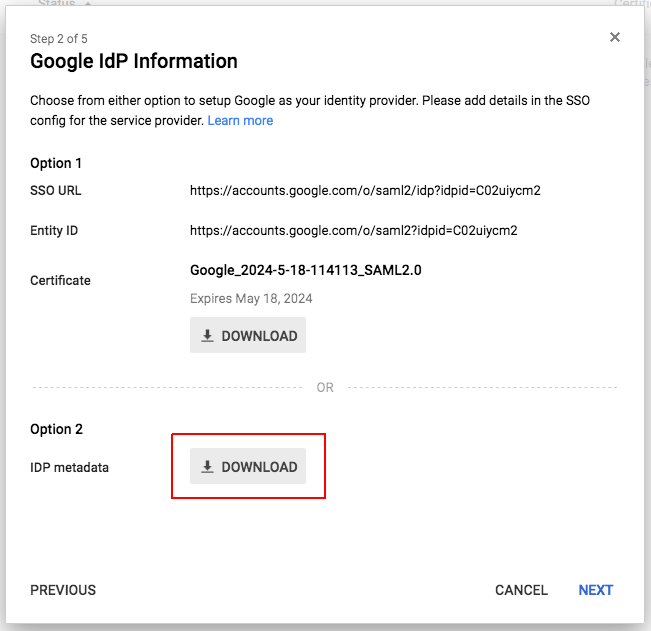
- In the Google Identity Provider details step, locate Option 1: Download IdP metadata.
- Click Download Metadata to save the Google IdP XML file to your computer.
- Click Continue.
Step 4: Configure Service Provider Details in Google
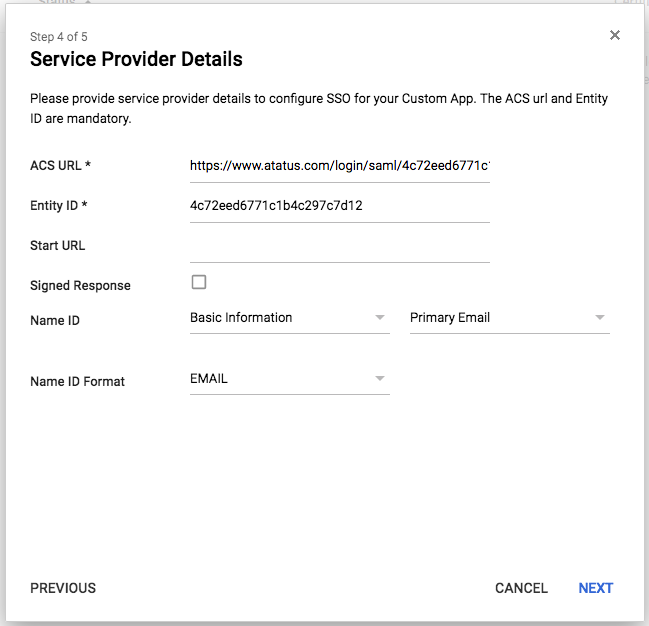
- Enter the Atatus Service Provider details:
- ACS URL: Paste your Atatus SAML ACS URL.
- Entity ID: Paste your Atatus Account Id.
- Start URL: Leave blank or enter
https://app.atatus.com. - Signed response: Ensure this checkbox is checked.
- In the Name ID section:
- Name ID format: Select
EMAIL. - Name ID: Select
Basic Information > Primary email.
- Name ID format: Select
- Click Continue.
Step 5: Configure SAML Attribute Mapping
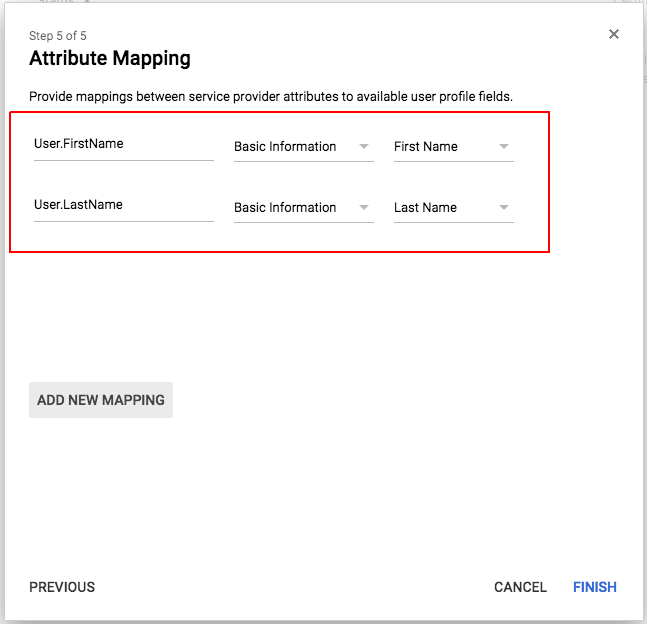
Map the Google directory fields to the exact SAML attributes expected by Atatus:- Click Add mapping.
- Configure the following attribute mappings:
- Click Finish.
Step 6: Enable User Access in Google Workspace
By default, newly created SAML applications in Google Workspace are set to OFF for everyone. You must explicitly enable access:- In the Google Admin console, open the newly created Atatus app details page.
- Click the User access card.
- Select ON for everyone (or turn it ON for specific Organizational Units / Groups).
- Click Save.
Changes to Google Workspace app access settings typically take effect within a few minutes, but can take up to 24 hours to propagate across all users.
Step 7: Upload Metadata and Configure Atatus
- Return to the Atatus dashboard under Settings » Account Settings » Single Sign-on.
- Under SAML Metadata from your SSO provider, select SAML Metadata XML.
- Click Choose File (or Browse) and select the Google IdP metadata XML file downloaded in Step 3.
- Click Save SSO.
- Confirm that the Enabled toggle switch displays active.