

What You Will Need
Before you begin, verify that you have:- An Atatus account with the Owner or Admin role.
- Administrative access to the JumpCloud Administrator Portal.
Step 1: Get Service Provider Values from Atatus
- Log in to your Atatus dashboard.
- Navigate to Settings » Account Settings » Single Sign-on.
- Keep this tab open. Copy and record the following parameters:
- Atatus SAML ACS URL:
https://app.atatus.com/login/saml/<ACCOUNT_ID>/acs - Atatus Account Id: Your unique 24-character alphanumeric identifier.
- Atatus SAML ACS URL:
Step 2: Add a SAML Application in JumpCloud
- Sign in to the JumpCloud Administrator Portal.
- In the left navigation pane, select User Authentication » SSO Applications.
- Click the + button (or Add New Application).
- Select Custom Application, then click Configure SAML.
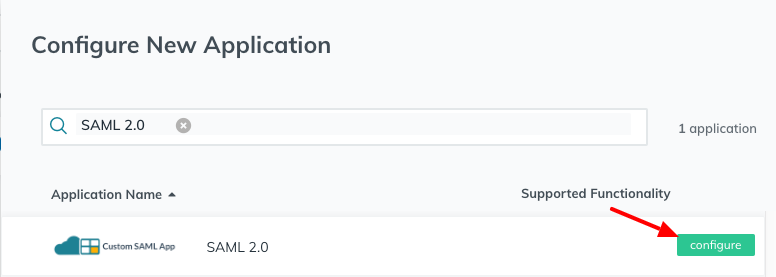
- In the General Info section, enter a Display Label (for example,
Atatus).
Step 3: Configure SAML Settings in JumpCloud
- In the Single Sign-On (SSO) section, enter the Atatus parameters:
- IdP Entity ID: Enter a unique identifier for JumpCloud (for example,
jumpcloud-atatus). - SP Entity ID: Paste your Atatus Account Id.
- ACS URL: Paste your Atatus SAML ACS URL.
- SAMLSubject NameID: Select
email. - SAMLSubject NameID Format: Select
urn:oasis:names:tc:SAML:1.1:nameid-format:emailAddress(orunspecified). - Signature Algorithm: Select
RSA-SHA256.
- IdP Entity ID: Enter a unique identifier for JumpCloud (for example,
- Check the box for Declare Redirect Endpoint.
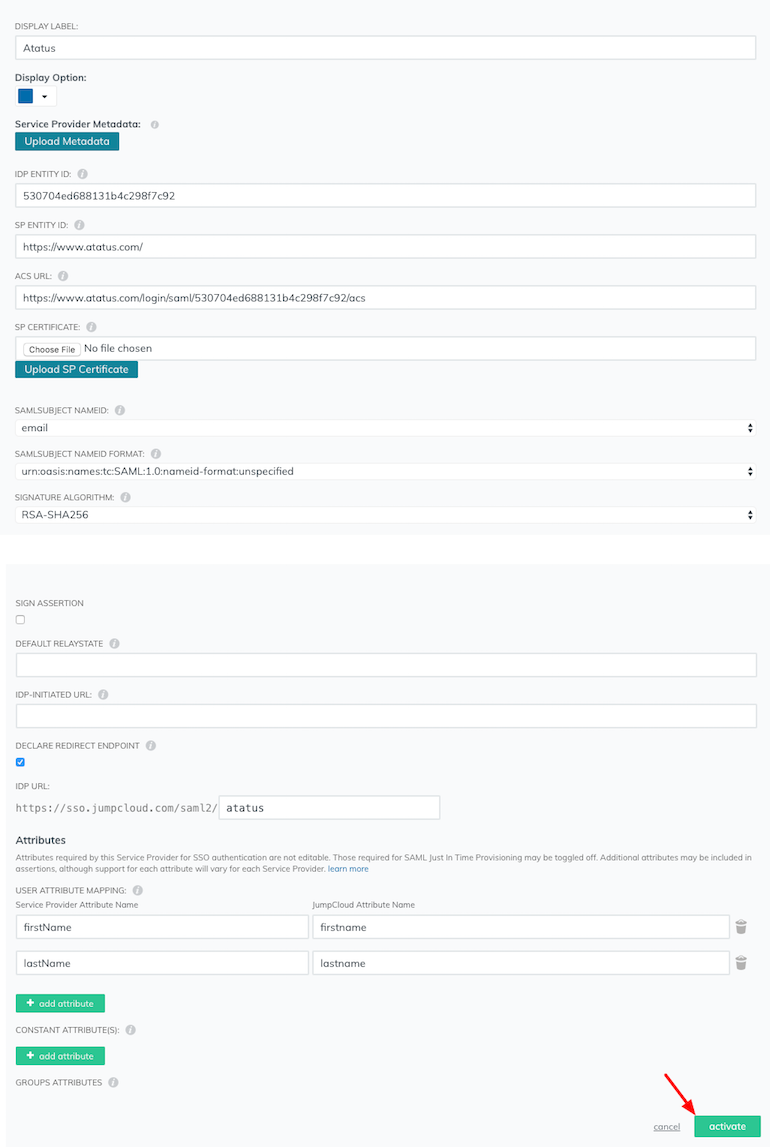
Step 4: Configure SAML Attribute Mapping
Under the User Attributes section in JumpCloud, click Add Attribute and configure the following claims:Step 5: Assign User Groups in JumpCloud
Users cannot authenticate until they belong to an assigned user group:- In the application configuration drawer, select the User Groups tab.
- Select the user groups requiring access to Atatus.
- Click Save (or Activate).
Step 6: Export Metadata and Configure Atatus
- In JumpCloud, reopen the configured Atatus application from the SSO Applications list.
- Under the Single Sign-On (SSO) tab, locate the Export Metadata link at the bottom of the drawer.
- Click Export Metadata to download the JumpCloud IdP XML metadata file to your computer.

- Return to the Atatus dashboard under Settings » Account Settings » Single Sign-on.
- Under SAML Metadata from your SSO provider, select SAML Metadata XML.
- Click Choose File (or Browse) and select the downloaded JumpCloud metadata XML file.
- Click Save SSO.
- Confirm that the Enabled toggle switch displays active.