

What You Will Need
Before you begin, verify that you have:- An Atatus account with the Owner or Admin role.
- Administrative access to your OneLogin portal.
Step 1: Get Service Provider Values from Atatus
- Log in to your Atatus dashboard.
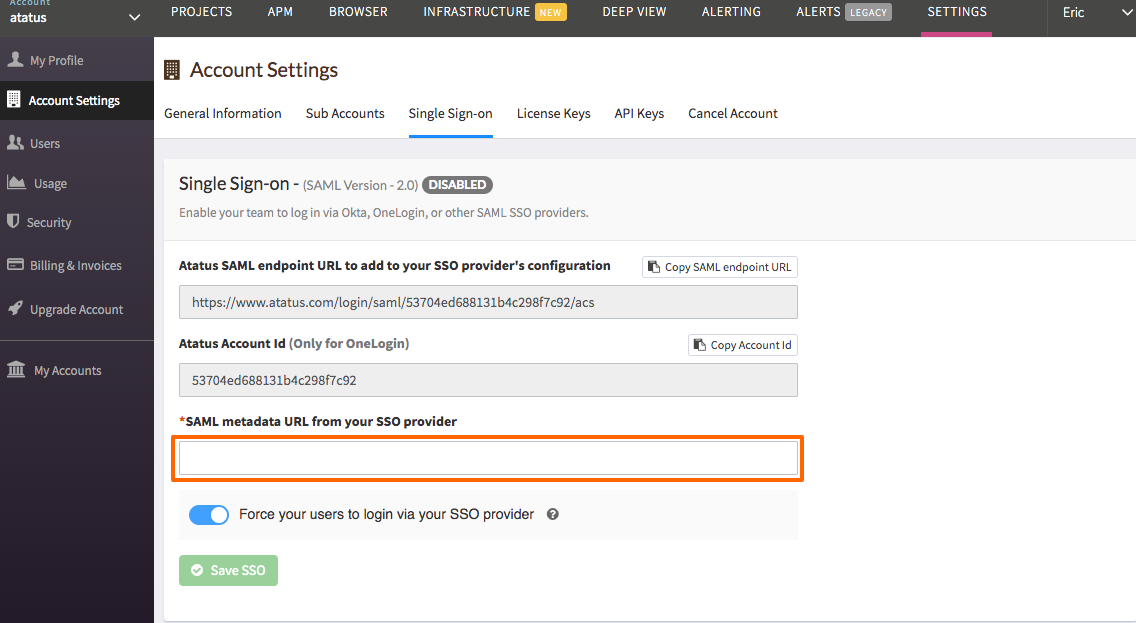
- Navigate to Settings » Account Settings » Single Sign-on.
- Keep this tab open. Copy and record the following parameters:
- Atatus SAML ACS URL:
https://app.atatus.com/login/saml/<ACCOUNT_ID>/acs - Atatus Account Id: Your unique 24-character alphanumeric identifier.
- Atatus SAML ACS URL:
Step 2: Add the Atatus App in OneLogin
- Sign in to your OneLogin Admin portal.
- In the top navigation bar, select Applications » Applications.
- Click Add App.
- In the search box, type Atatus and select the Atatus SAML 2.0 connector from the search results.
- (Optional) Customize the display name or icons, then click Save.
Step 3: Configure SAML in OneLogin
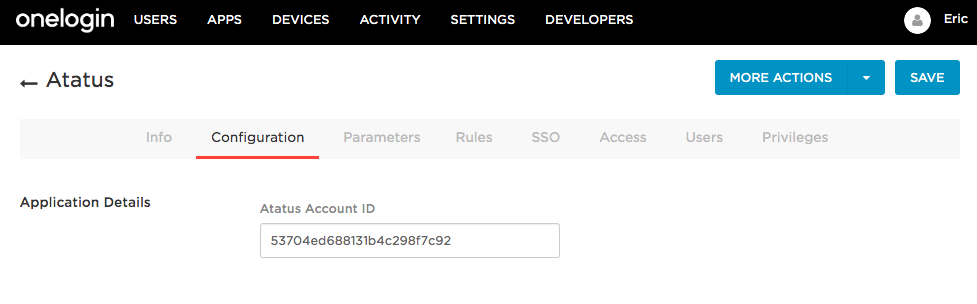
- In your newly created application, select the Configuration tab.
- In the Atatus Account ID field, paste the Atatus Account Id copied from Atatus in Step 1.
- Click Save.
Step 4: Verify Attribute Parameters
- Select the Parameters tab in the OneLogin application view.
- Verify that user attributes are mapped to the standard Atatus parameters:
- Click Save if you made any modifications.
Step 5: Assign Users and Roles in OneLogin
Users cannot access Atatus until assigned in OneLogin:- Select the Access tab in your application view.
- Select the Roles that should have access to Atatus.
- Alternatively, navigate to Users » Users, open an individual user profile, select Applications, and add the Atatus application directly.
- Click Save.
Step 6: Copy Metadata and Configure Atatus
- In your OneLogin Atatus application, select the SSO tab.
- Locate the Issuer URL field. This URL points directly to your OneLogin SAML metadata descriptor endpoint (
https://app.onelogin.com/saml/metadata/...). - Click the copy icon next to the Issuer URL.
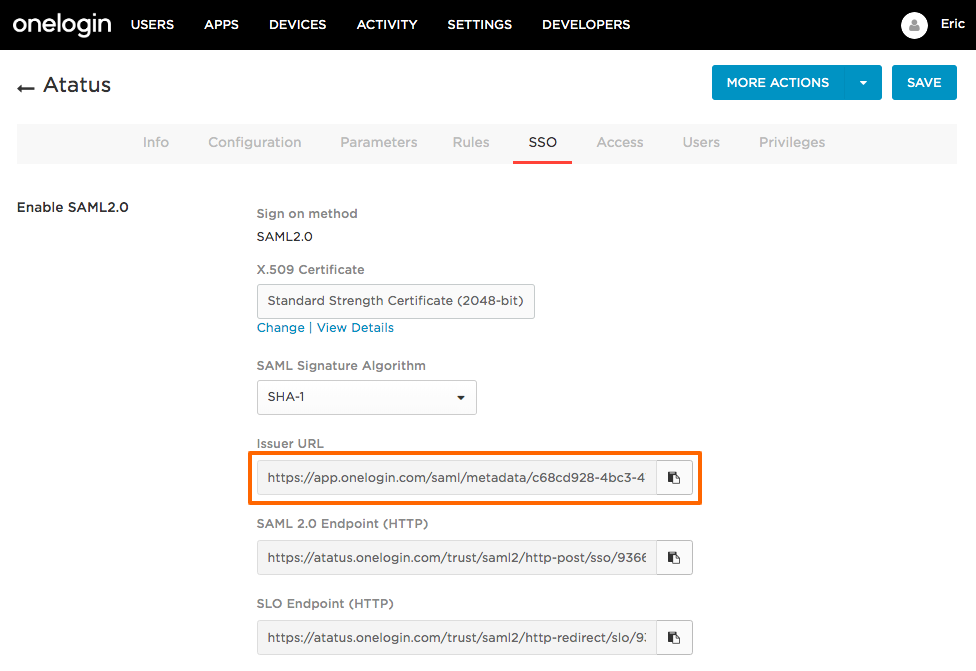
Atatus parses your SAML sign-in endpoints and certificates directly from the Issuer URL. Do not paste the SAML 2.0 Endpoint (HTTP); Atatus derives that endpoint automatically from the metadata descriptor.
- Return to the Atatus dashboard under Settings » Account Settings » Single Sign-on.
- Under SAML Metadata from your SSO provider, select SAML Metadata URL.
- Paste the OneLogin Issuer URL into the text field.
- Click Save SSO.
- Confirm that the Enabled toggle switch displays active.